As an Expert, you can always send your Knowledge Seekers to your Expert Page to access your AI Agent. That said, many of our Experts have their own websites, author platforms, or community management systems where they want to provide access to their 24x7 answers in a way that is seamless to the existing experience.
To help with this, the Embedded Agent can be used to embed your AI Agent in nearly any website. As the Expert, you control the Agent title, color, and other attributes. You can also decide whether to let any visitor to your website access your assistant, or require them to login as a member of your Knowledge Hub first.
To see an example of how we use the Embedded Agent ourselves, visit the Answers From Me home page and click the "Ask a Question" button in the bottom right:

Here are instructions for embedding your AI Agent in your own website or web application:
Before you begin
To use the Embedded Agent:
- Your web hosting or author platform must allow you to modify the HTML and Javascript of any page where you intend to embed the Agent. Ideally you can insert arbitrary HTML, but at the very least you must be able to add an IFRAME element.
- You must have a Knowledge Hub on Answers From Me for which you are the Expert
- You should feel comfortable editing HTML and CSS
Step 1. Enable the Embedded Agent
The Embedded Agent can be enabled from the Web Embed section of your Settings.
- Sign in to Answers From Me
- Click Settings in the left navigation of your Expert Dashboard, then click the Connect tab and scroll to the Web Embed section
- Make sure that Enable the embedded Agent for web is turned on.
You can also choose whether to require that users are signed in so that you can track them in your Hub, or allow anonymous access.
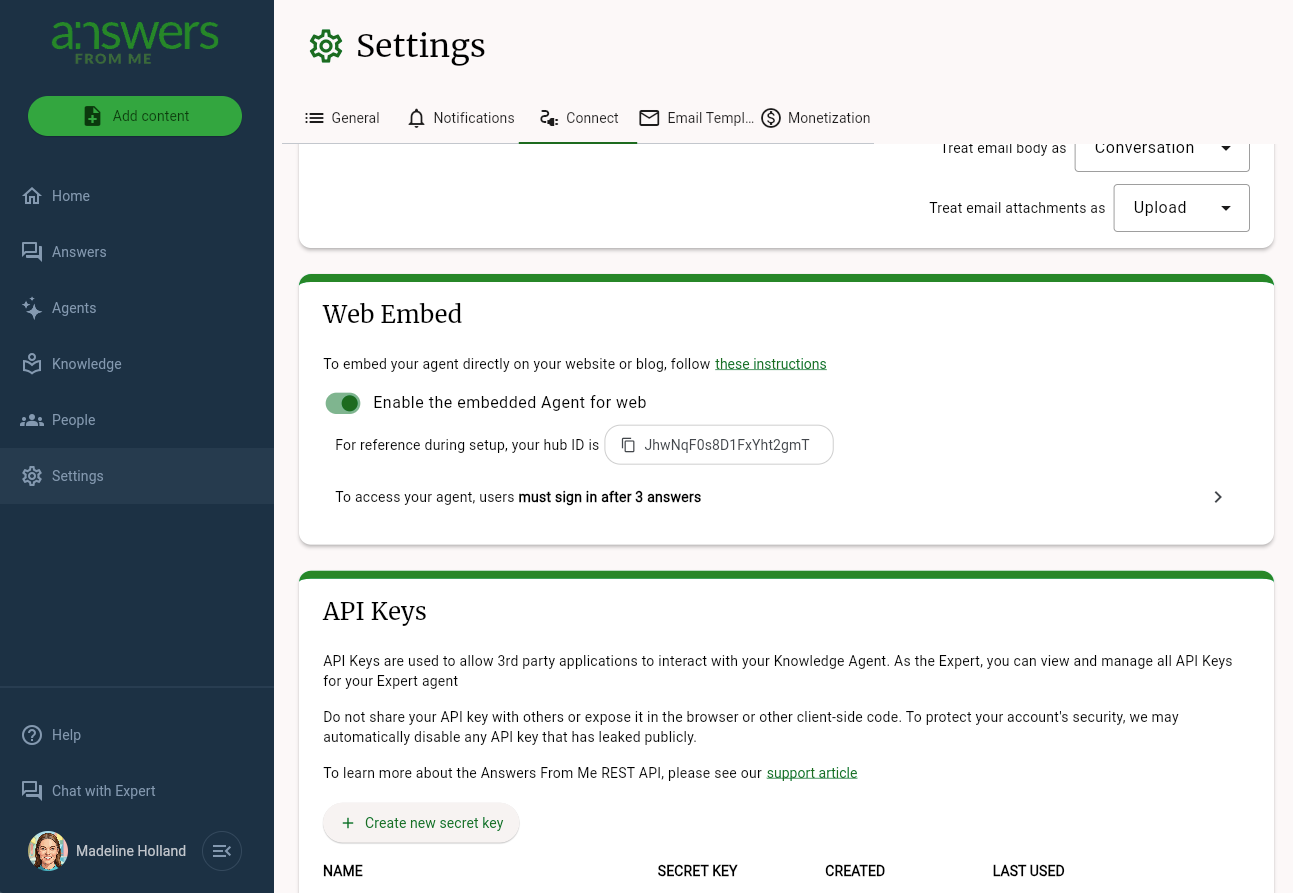
Step 2. Find your Hub ID
Once you enable the embedded agent, your hub ID is shown in a click-to-copy button. Your hub ID is a persistent identifier for your knowledge base and associated agents on Answers From Me. You'll need this hub ID to complete the embed code in the next step.
Step 3. Add the Agent HTML Code
If your web host or platform supports adding HTML code (preferred):
If your authoring platforms supports adding HTML code directly, identify the page where you want to add the Agent and edit the HTML source code for that page. Just before the closing </body> tag of your page (or somewhere near the bottom), insert the following HTML code:
<!-- Answers From Me embedded agent -->
<script src="https://app.answersfrom.me/seeker/embed.js"></script>
<div id="afm-embedded-agent" data-afm-embed-hubId="YOUR_HUB_ID"
></div>
The name and color and other configuration for your agent will be set based on your agent settings. You can override the behavior by passing in additional "data-" parameters, shown below.
<!-- Answers From Me embedded agent -->
<script src="https://app.answersfrom.me/seeker/embed.js"></script>
<div id="afm-embedded-agent"
     data-afm-embed-buttonLabel="Ask a Question"
     data-afm-embed-hubId="YOUR_HUB_ID"
     data-afm-embed-color="(6-digit hex color)"
     data-afm-embed-title="Help Agent for MySite.com"
     data-afm-embed-expandable="false"
     data-afm-embed-showSources="true"
     data-afm-embed-showCopy="false"
     data-afm-embed-showRequestReview="false"
     data-afm-embed-showFeedback="true"
></div>
Note that certain settings, such as show sources or request review, can be overridden to false but not to true, so if you want those features you must enable them in your agent settings on the Answers From Me app and then they will be available for use in the embed.
If your web host or platform does not support adding HTML code:
Some author platforms allow only limited forms of embedding code, for example adding an IFRAME embed for YouTube videos but not full HTML code as required above. In that case, your Agent can be embedded via an IFRAME, however be aware that the Agent will be "always on" (no open or close buttons) and you will need to use other mechanisms provided by your author platform if you want to dynamically show or hide the Agent.
To add the Agent via an IFRAME embed, insert this item into your page:
<iframe src="https://app.answersfrom.me/seeker/index.html#?hubId=(your hub ID)&expandable=false"></iframe>
A few of the customization parameters from Step 4 below are available for the IFRAME mode of embedding the Agent, but without the "data-afm-embed-" prefix. These are title, color, showSources, showCopy, showRequestReview, and showFeedback.
<iframe src="https://app.answersfrom.me/seeker/index.html#?hubId=(your hub ID)&title=My Agent&expandable=false"></iframe>
Since the web authoring platform will control the layout of the page, you will have to use features of your platform to control the geometry of the IFRAME.
Step 4. Update the parameters in the code
Use the table below to update the default parameters above for your deployment
| Parameter | Description | Example |
|---|---|---|
| data-afm-embed-buttonLabel | The label of the button to open the Agent | Ask a Question |
| data-afm-embed-hubId | Your Knowledge Hub ID (see step 1) | ZpNcQDcEcCTuGjEutFSV |
| data-afm-embed-color | The header color as a 6-digit hex value | 126b56 |
| data-afm-embed-title | The title for your assistant | Ask Scott's Agent |
| data-afm-embed-expandable | Renders an expand/contract button that messages the host page for dynamic layout | true or false |
| data-afm-embed-showSources | Whether the Agent shows source citations beneath its answers | true or false |
| data-afm-embed-showCopy | Whether the Agent shows a copy button below its answers | true or false |
| data-afm-embed-showRequestReview | Whether the Agent shows a flag button for users to request answer review | true or false |
| data-afm-embed-showFeedback | Whether the Agent provides feedback buttons (thumbs up, etc.) below each answer | true or false |
Step 5. Preview, test, and publish
Using your platform tools, preview the change above, and if it looks good, go ahead and publish to your website. As users visit your site and ask questions, you'll see them in your Answers section in the app, and get notifications just as if the questions were submitted using the Answers From Me application.
Advanced Styling
While the parameters above can be used to control basic styling, you can further modify appearance and behavior of the Embedded Assistant using the Advanced Styling article.
Was this article helpful?
That’s Great!
Thank you for your feedback
Sorry! We couldn't be helpful
Thank you for your feedback
Feedback sent
We appreciate your effort and will try to fix the article